Blood Sugar Log Book Templates: A Publisher’s Guide to Creating High-Value KDP Interiors
Creating a printable health tracker for Amazon KDP requires more than just placing table grids on blank pages. A well-designed blood sugar log book template bridges the gap between a simple data collection sheet and a practical tool that helps users manage their daily health routines. For KDP publishers, the interior is the product. It determines whether a buyer finds the log book useful enough to keep using—and whether they leave a positive review.
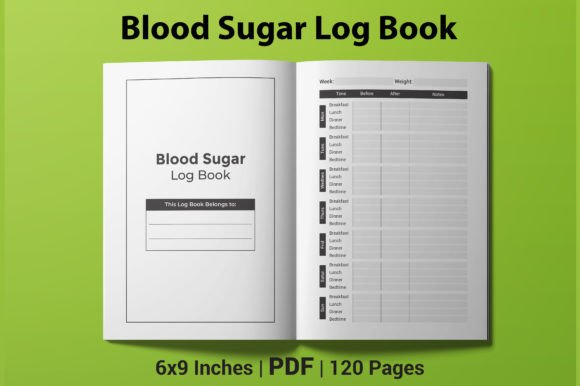
Blood sugar log book templates serve as structured recording systems for individuals who need to track glucose levels, medication timing, meals, physical activity, and notes. These templates become a daily reference point for users coordinating their health data with healthcare providers. For you as a publisher, the template is also a product asset that must be formatted, tested, and uploaded correctly to KDP. Understanding the workflow from template design to final upload helps you avoid common pitfalls and produce interiors that stand out in a competitive niche.
Where Blood Sugar Log Book Templates Fit in a Publisher’s Workflow
When you decide to publish a blood sugar log book on KDP, the process involves several distinct phases. The template sits at the center of that process. It is not just the final file you upload—it is the blueprint you use to generate multiple page sizes, formats, and variations.
Think of the template as the source file from which all output formats originate. You design it once in a vector application such as Adobe Illustrator or Affinity Publisher. From that single source, you export the print-ready PDF, the editable AI file for later revisions, the EPS for compatibility with older software, and the JPG previews for mockups or marketing materials. This approach saves time and ensures consistency across all formats.
The template also interacts with your cover design. The interior dimensions—6 x 9 inches with no bleed—must match your cover file exactly. If your interior is 6 x 9 with no bleed, your cover must be built for the same trim size and spine width determined by the page count. Since you are creating the interior only, you need to communicate the exact page count to whoever builds your cover. A 100-page interior produces a different spine width than a 110-page or 120-page version. Getting this wrong leads to misaligned covers and rejected uploads.
Designing the Log Book Layout for Real Use
A blood sugar log book is used in moments of focus—often first thing in the morning, before and after meals, and before bed. The layout must support quick entry without friction. Each row or section should be clearly labeled, and the spacing should accommodate handwriting of varying sizes. Users may have unsteady hands or write in low light, so generous row height and clear lines matter more than decorative flourishes.
When building your 6 x 9 inch interior, keep the following practical factors in mind:
- Margins – The live area should sit inside a 0.5-inch margin on all sides. KDP’s print engine needs at least 0.25 inches for safety, but more white space makes the log book feel open and easier to write in.
- Column width – The date, time, blood sugar level, medication, meal notes, and activity fields should have adequate width. Avoid squeezing everything into narrow columns. Users appreciate a dedicated notes column for context.
- Row spacing – Offer at least 0.3 inches per row to allow for handwriting. If you include daily spreads, keep the entry area generous.
- Headers – Use bold, legible headers that repeat on every page. A user should never have to flip back to the first page to remember what a column means.
- Page numbers – Include page numbers for referencing past entries. This is a small detail that adds professionalism.
A common mistake among new publishers is cramming too many entries per page to reduce page count and printing cost. While a lower page count reduces the base production cost, it also reduces the perceived value and usability of the log book. If the user cannot fit a full week of entries without turning the page, they will look for another product. Fifteen to twenty entries per page is a comfortable middle ground for a 6 x 9 layout.
Choosing Between 100, 110, and 120 Pages
Your template should be designed with variable page counts from the start. Instead of manually adjusting each version, build a master layout and duplicate or remove pages as needed. Here is how each page count aligns with typical usage patterns:
- 100 pages – Suitable for a 90-day log with some introductory pages and a summary section. This is the lowest entry point and keeps the printing cost down. It works well if your target buyer wants a compact book for a short-term tracking period.
- 110 pages – Adds roughly ten extra pages for additional notes pages, a blank table of contents, or extended tracking fields. This version provides a middle option without significantly raising the cost.
- 120 pages – Offers room for a full 90-day log plus a robust front section with instructions, a medication list, a food reference chart, and several summary pages. This version appeals to buyers who plan to use the log book long-term and want extra space for personalization.
When you prepare your PDF file for KDP upload, confirm that the actual page count matches the metadata in the manuscript file. KDP scans the file and reports the page count automatically. If your listing says 120 pages but the file contains 118, the inconsistency can cause a review flag. Double-check the page count after export and before uploading.
Preparing the Files for Amazon KDP
The template package you offer should include four file types: PDF, AI, EPS, and JPG. Each serves a specific purpose in the publishing workflow:
- PDF – The primary upload file. It must be press-ready with embedded fonts, high-resolution images (300 DPI), and no transparency issues. Flatten all layers, outline fonts, and convert all colors to CMYK. Run the PDF through KDP’s preview tool before submitting.
- AI – The editable source file. This allows you or a collaborator to adjust the layout, change colors, or add new sections without rebuilding the entire design. Save it with layers intact and fonts included.
- EPS – A fallback format for compatibility. Some designers and cover creators prefer EPS for importing into older software. Keep it as a single artboard without effects that may not render correctly.
- JPG – Use for preview images on your product page, social media posts, and mockups. Export each page as a separate high-quality JPG at 300 DPI. Include the cover-sized spread if you plan to show the interior spread in your listing images.
When exporting the PDF, pay attention to the bleed setting. Since your interior has no bleed, set the bleed to 0 inches in your export dialog. Pages that extend beyond the trim line will cause the PDF to fail KDP’s automatic check. For a 6 x 9 inch book, the page size in the PDF must be exactly 6 x 9 inches. Any deviation—even a fraction of an inch—will be rejected.
Usability Considerations for the End User
Your buyer is likely managing a chronic condition or caring for someone who does. They are not purchasing a decorative coffee table book. They need a reliable record-keeping tool. The following design decisions affect how useful the log book feels in daily use:
- Paper weight – While you cannot control the paper after printing, you can account for show-through by keeping the design simple. Avoid heavy ink coverage on the reverse side of pages. Lighter grids and thin lines reduce visual noise.
- Binding type – KDP prints perfect-bound books by default. A 6 x 9 inch book with 100 to 120 pages opens reasonably flat, but you should still keep text and columns at least 0.5 inches from the spine to avoid content disappearing into the gutter.
- Color vs. grayscale – Blood sugar log books work well in black and white. Color printing adds cost without significant benefit for log-style tracking. Stick to grayscale interiors to keep the base cost low and the price competitive.
- Space for additional notes – Include a notes page at the end of each week or month. Users often need to jot down context that does not fit into the structured fields, such as symptoms, medication changes, or questions for their doctor.
Integrating the Template into a Broader Health Tracking Routine
Blood sugar log books rarely exist in isolation. Many users also track food intake, exercise, medication schedules, and doctor appointments. Your template can acknowledge this by including dedicated sections for meal timing, insulin dosage, and physical activity. When these fields are present, the log book becomes a single point of reference that reduces the need for multiple notebooks.
This integration also benefits you as a publisher. A template that supports multiple tracking dimensions appeals to a broader audience. Caregivers, for example, often need to monitor several variables at once. By including fields for medication type, dosage, and time of day, you make the log book useful for people managing complex care plans.
If you want to go a step further, add a summary page template at the front or back of the book. A summary page can display weekly averages, high and low readings, and a checklist for medical appointments. Users can fill this out periodically and tear it out to bring to a doctor’s visit. This small addition increases the practicality of the log book and gives buyers a reason to choose your product over simpler competitors.
Maintaining Consistency Across Multiple Versions
If you plan to publish several blood sugar log books—different page counts, cover variations, or language versions—consistency in the interior design builds trust with your audience. Use the same grid layout, font choices, and column structure across all versions. When a customer sees a familiar layout in a new product, they know what to expect.
Keep a master template file that contains all possible sections. For the 100-page version, include only the essential daily log pages and one notes page. For the 120-page version, include the full set of introductory pages, daily logs, summary pages, and extended note sections. By maintaining one source of truth, you reduce the chance of formatting drift between versions.
Label your files clearly. A naming convention such as BloodSugarLog_6x9_100pages_NoBleed.ai tells you everything about the file without opening it. This becomes important when you have multiple products in the same niche and need to upload the correct file on the first attempt.
Preparing for KDP Upload and Review
Before you upload the PDF, run a thorough QC check. Print a test page on your own printer and check the alignment. Look for orphan headers, inconsistent line weights, and any missing text. Check that page numbers are sequential and that the first page is a right-hand page if you are starting the log on page one.
Upload the PDF to KDP and use the online preview tool. Scroll through every page. Pay attention to spreads—the way two facing pages line up. If the binding area cuts off content, adjust the margins and re-export. Once you approve the preview, submit the manuscript for review. The review typically takes less than 48 hours, and you will receive a confirmation when the book passes.
After the book is live, monitor customer feedback. If multiple reviewers mention that the rows are too small or the margins are too tight, use your editable AI file to make adjustments and upload an updated version. KDP allows you to replace the manuscript file at any time. Regular updates based on user feedback improve your ratings over time.
Blood sugar log book templates are a practical product category with steady demand. When you design the interior with real user workflows in mind, choose your page count strategically, and prepare your files correctly for print, you create a product that serves its purpose and performs well on KDP. The template is not just a file—it is the foundation of your entire listing.